This rose napkin is believed to have been collected by Stephen Weiss.
Such party tricks and napkin folds are often taught to the young and passed on from one generation to the next. It is quite a tricky final technique to master, and, because you are using a tissue napkin, you will need to treat the material with great care.

Step 1: Begin with a tissue napkin, as square as it can possibly be (not all packet the napkin are cut perfectly square). Open the napkin out completely, and arrange as shown.

Step 2: Fold the left edge inwards by 2-3cm / 0..75-1.25in.
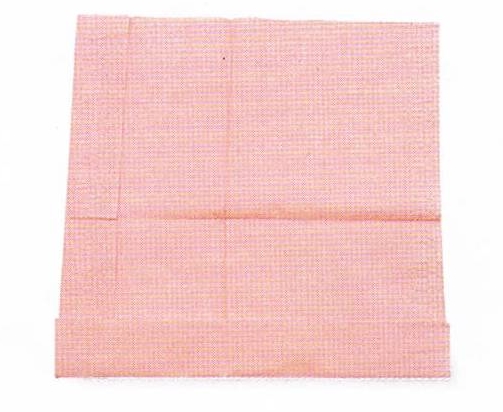
Step 3: Now fold the lower edge up by 2-3cm / 0.75-1.25in.

Step 4: Place two fingers across the napkin, holding the horizontal strip at the lower left corner, using your thumb to hold the napkin underneath.

Step 5: Begin to roll the lower edge upward, doubling over the 2-3cm / 0.75-1.25in once again.

Step 6: To help you roll the entire height of the napkin, use your other hand to wrap the upper portion of the tissue over towards you, over the horizontal roll of material.

Step 7: The rolling almost completed.

Step 8: About 4-5cm / 1.5-2in in from the left edge, pinch the tissue tightly, squeezing the layers flat, whilst allowing the left-hand section to remain loosely rolled.

Step 9: Begin twisting the napkin tightly, to form the stem.

Step 10: Continue twisting to about halfway down the length of the roll.

Step 11: Take hold of the outermost corner of the napkin at the lower end of the tube: the base of the stem. Pull this layer upward, fluffing the ply of tissue into a soft point.

Step 12: Continue twisting the lower end of the rose, to complete the stem.

Step 13: For the rosebud, carefully turn the outer rolled layers over, to suggest the outer petals. Carefully arrange the inner rolled layers to suggest the inner petals.

The rose napkin completed.